Lab-Tools.comRaspberry Pi - How To do the Initial Setup.Dr. Beau Webber
|
|
|
This discussion considers the initial purchase and set-up of the Raspberry Pi, so that it can be accessed, programmed and controlled from another computer, such as a laptop, and does not always need its own monitor.
Good websites : Purchasing notes:Buy a B version Raspberry Pi - it has more memory and 2 USB sockets.If you buy separate items : (see: www.raspberrypi.org/quick-start-guide ) A box for the Raspberry Pi is recommended for a longer life. The power supply should be over 1 Amp. But a 1 Amp iPhone power supply with USB output may work. The lead should end in a micro (not mini) USB plug. For Internet access an ethernet wired connection is best. A wifi connection may well work for accessing the internet. However when logging in through it, I find the wifi drops the connection sometimes, so I now use wired ethernet. Radio Keyboard and Mouse - works, but mine sometimes multiple keys letters. TV/Monitor : A digital TV/monitor is recommended to aid with initial set-up, one with digital connection (DVI or HDMI). So you will need a HDMI to (DVI or HDMI) cable. Once you have done the initial configuration using a monitor, it is oftem more convenient to work using a window on a PC or Mac, via the ethernet, see below. |
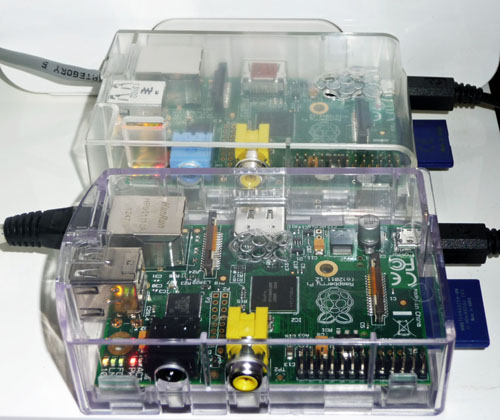
Two boxed Raspberry Pi Linux credit-card sized computers, connected to a home network, set-up for control, programming and file copying from a Windows laptop. |
First BootPlug the SD card in first and power last.There should then be lots of scrolling text, after a first-time delay. login : pi password : raspberry You should get a menu on a blue page, with some things to configure. The main one : resize the partitions on image to fill the SD card. Then : : startx will start a graphical desktop. Try a web browser or calculator accessory, or the File Manager : Menu => Accessories => File Manager If you want to do more text commands, open a command window : Menu => Accessories => LXTerminal If you want to issue privileged commands (as per root) then use : sudo COMMAND I.e. to shut the machine down, logging off all users tidily : sudo shutdown -h now To set up another user account (i.e. user1), and their home directory and initial password : sudo useradd -m user1 sudo passwd user1 If this user needs to use sudo, this may come by default (check). If not do : adduser user1 sudo Update all the software to the latest version :sudo apt-get updatereboot This will log you off. If you allow the Raspberry Pi onto the world-wide web (see later), first change the password for pi : sudo passwd pi It is sometimes useful to have access to the world-wide-web from a textual window - install lynx text web browser : sudo apt-get install lynx |

Raspberry Pi Graphical User Interface (GUI). |
Logging in from a PC or MacThe OS will start SSH and SCP at boot time by default,so you can then log in using a window on your PC or Mac, and transfer files. To find your IP address on the local network : ifconfig or ip address show On a PC, download PuTTY from : www.chiark.greenend.org.uk/~sgtatham/putty/ and then use SSH, inserting the correct ip address, and port 22. You should then get a text window where you can log in as any user that you have configured. Configuring to have a graphical Raspberry Pi screen on a PC or MacInstall tightvncserver :sudo apt-get install tightvncserver Configure it : tightvncserver If the password is not now set, do it now : vncpasswd Run a server : here we are running server 0, with a large screen : vncserver :0 -geometry 1920x1080 -depth 24 Here is a smaller less demanding screen : vncserver :0 -geometry 1024x768 -depth 16 Often on my laptop I use a small window 750x500 ... vncserver :0 -geometry 750x500 -depth 16 To kill the server use : vncserver -kill :0 On the PC one needs a VNC viewer, i.e. install one from : www.tightvnc.com/ This then gives a configuration panel and connection panel. Enter the Remote Host Ip and window number : i.e. 192.168.1.71:0 and press connect. Hopefully you will get a window that allows you to enter the VNC password you set above, and then the Raspberry Pi desktop should open in a window. |
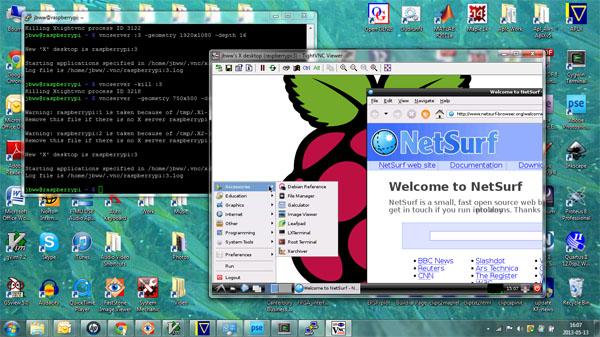
RaspberryPi - SSH + VNC windows on PC. |
All the best, this has worked for me, I hope it helps, but of course things change, no guarantees.